If you're not a fan of reading, here's a video we made on YouTube about the topic.
This is our current space where we make our models. It's messy, poorly lit, and inefficient. For a model maker, it's impossible to stay focused in a space like this. So let's make this place better and more efficient with just a few steps. Also, we're giving away a special gift to anyone who needs it at the end of article. Make sure you stick around for that!

Step one: clearing everything out. We need a blank space to start. First, let's get rid of the ugly grey wall by painting it black. Because this is the space we will be shooting our videos from, we think it's best if we keep the colors uniform and use matte black. This will help us control lighting in our videos by reducing light bounce, resulting in better-quality content moving forward.

Step two: let's install the pegboards on the wall. These are just generic pegboards. If you're looking to build something like this, we definitely recommend getting something better. We've had the idea of using the pegboards to display the model kits we have built, because just look at our current situation: it's a glass cupboard stuffed with our models, so we want to improve it. With the pegboards up on the wall, it's time to put our model kits in the place they deserve.
The desk setup is simple; we just got a regular desk lamp. It's practical and does the job well. We've placed all of the tools, storage racks, and shelves against the wall to give us more space to work on the model kits on the desk.
When it comes to the painting area, we've kept things really simple. The GTX-778 air compressor sits at the corner junction of the L-shaped tables, so it could power both spaces. We sometimes use air-powered grinding and sanding tools for our projects in the dry area, and they can also power our airbrushes in the painting area. We've placed the GTX-778 on the table because... It's just so beautiful to look at, so it deserves a spot on the table. Another focal point of the painting area would be the Airhub Pro. We've connected the GTX-778 to it, and now it powers up to 4 airbrushes simultaneously with their individual PSI regulators. So now each airbrush has its own purpose.

Then it would be the waterfall spray booth. We are working on our version at the moment, too bad it's not going to be a folded one, we apologize for that, but it's still going to be something awesome, which we promise. Anyway, for paint storage, we just use some off-the-shelf solutions, painted everything black for aesthetic reasons, and let the colors of the Kaleido paint bottles serve as natural decorations.
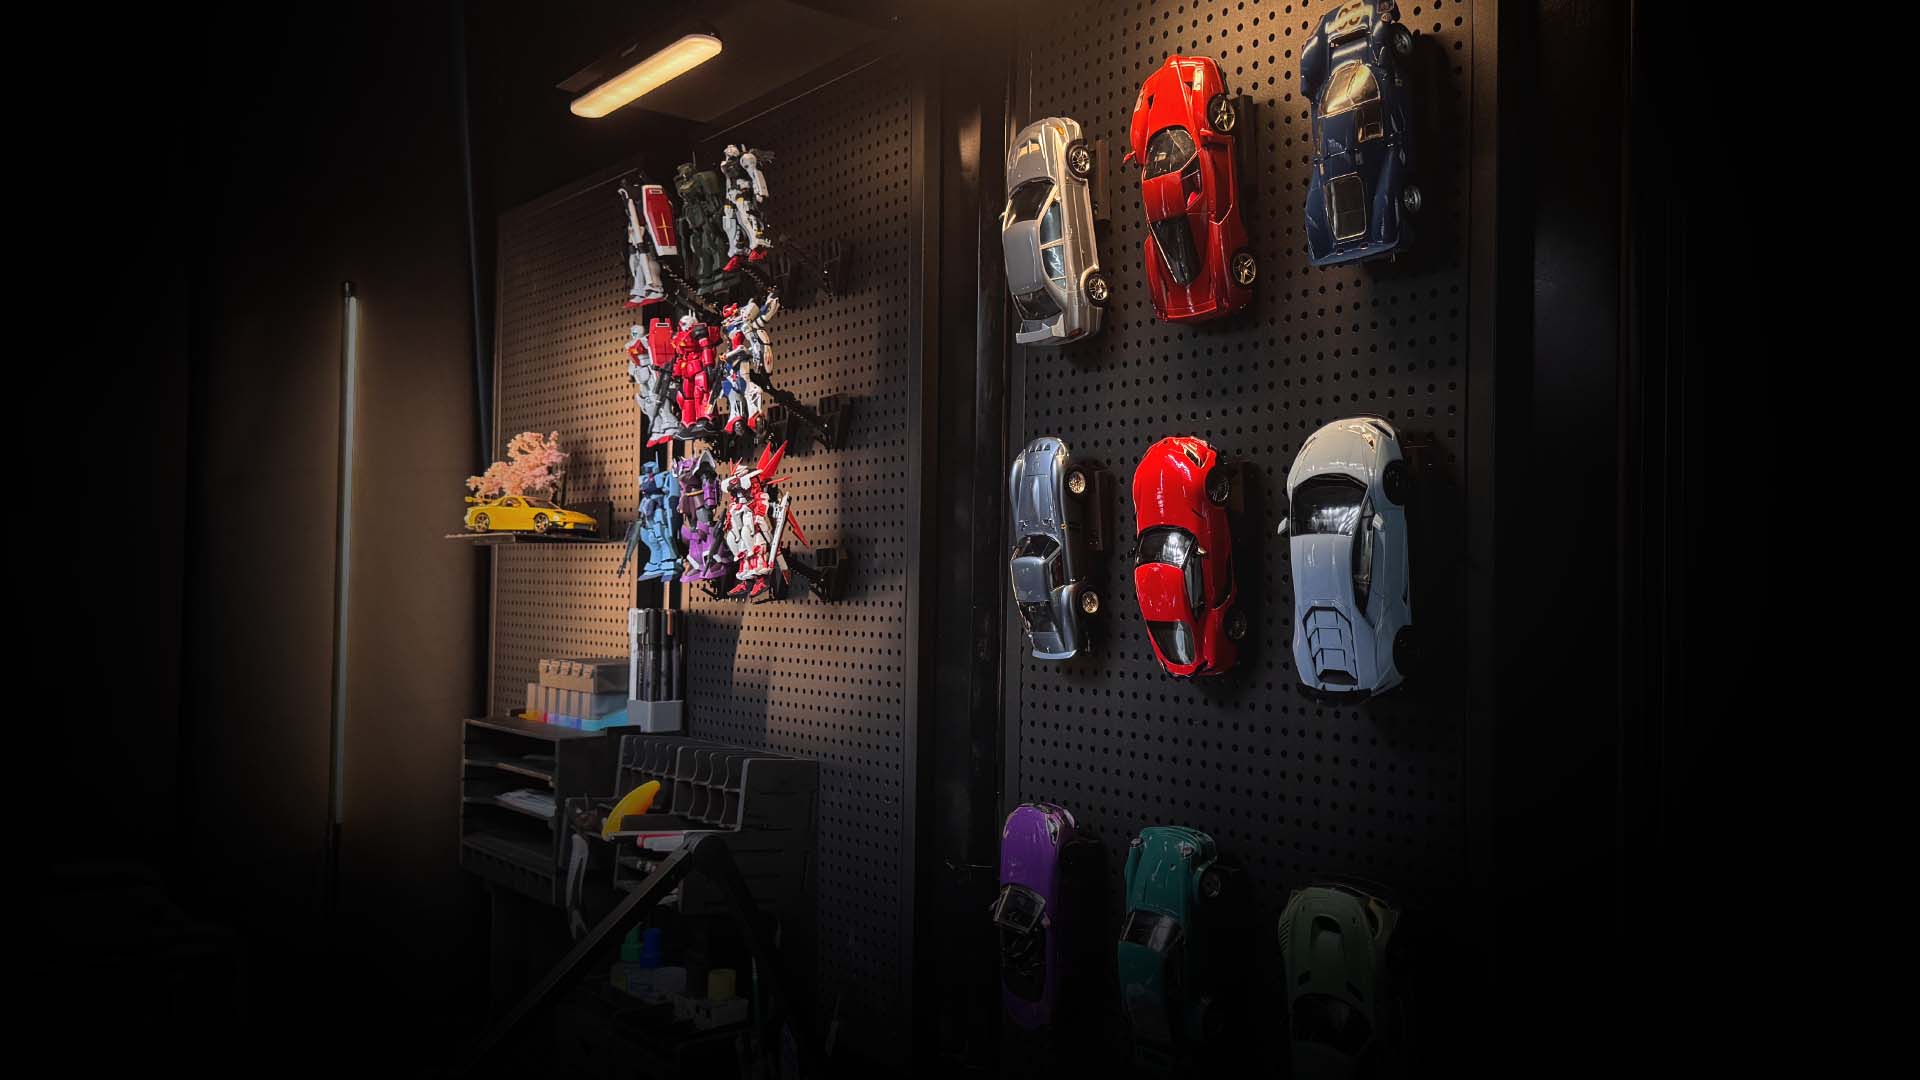
Hanging our model kits on the pegboards: To achieve this effect, we 3D-designed and printed our own pegboard display stand. We know that on the market, there are many pegboards with various hole sizes and hole spacings. To make this a universal pegboard display kit, we've designed it as a modular system with adjustable pegs. Here's how it works. Depending on what you have and what you want to display, we have 2 kinds of bases. One for gunpla and another for 1/24-scale model cars. First, let's have a look at the one for gunplas. It has a smaller base with a 6 millimeter hole for you to insert your generic or Bandai display stand. And at the back, we have an angled peg with an adjustable locking system. You insert the peg into the base horizontally, then rotate it vertically to lock it in. You can then adjust the distance of the two pegs according to the holes on your peg boards. Then you just have to hang it on your pegboard, plug in your display stand, place your gunpla on it, and you're done

Now for cars, it's a bit trickier. We have a much bigger base, and 2 types of inserts. One is the one you saw earlier, made for the pegboards, and the other is on the opposite side for the wheels of your scale model cars. It's basically a hook that attaches to a car's suspension arm. We have now tested the angle of the hooks against our model cars, and they work just fine. Some may require a bit more effort than the others, but it works. We looked around the internet and found some that work, but there isn't a universal one that fits most pegboards, so we've decided to make our own.

The good news is that now you can get them on our website! We are giving these STL files away for free on our website, with the link here, complete with all the information and tutorials you need on how they work. Now you can print them at home with your 3D printer. Whether you're using a filament or a resin printer, it doesn't matter. We hope you like this article and the pegboard stands, and we ask only that you share it with your friends or family. It's greatly appreciated!